Posts tagged ‘tutorials’

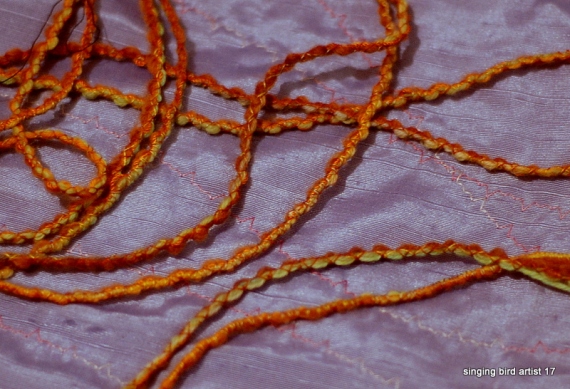
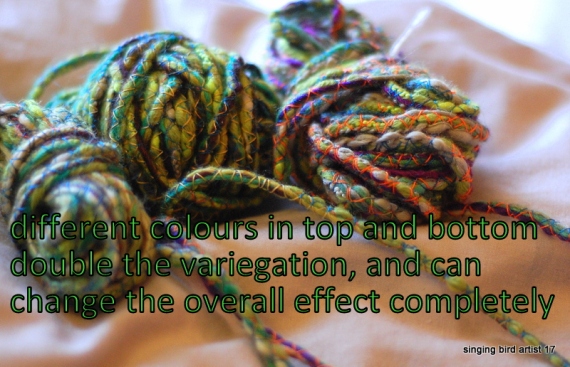
tutorial: machine cords

apologies for some blurriness, my eyes are very dry because of the fibromyalgia or the meds, and the gel that helps the pain gives my eyes a mucky windscreen effect, so making sure the camera is focused is no fun at all! Thanks to Cherise for taking the clearer shots!
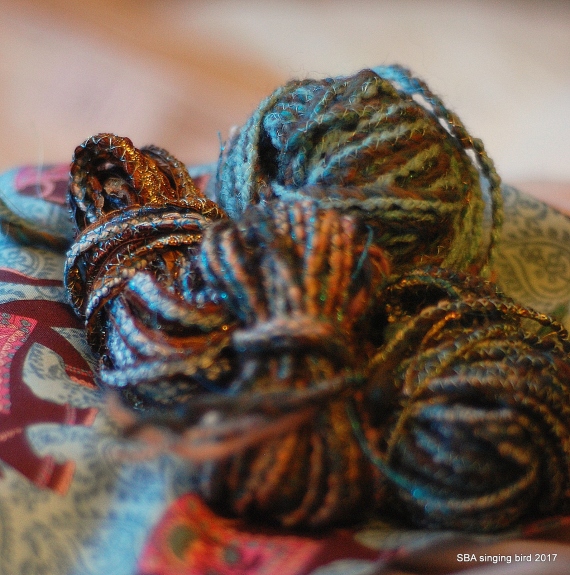
dsc_0074

Machine cords are very easy to make and have dozens of uses. They’re a useful way to use up half bobbins of thread and scraps of yarn and to add a different texture to your collages or fibre sculptures. If you want to cut back on wrapping paper etc tying a bow with cord round books or a bottle adds a festive touch, that can be re-used by the recipient too.

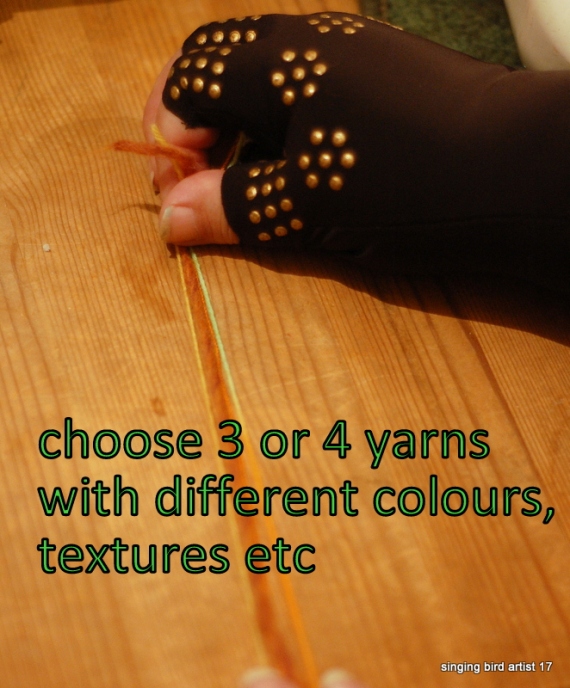
1.Choose your colours/textures to suit your end use, or just for fun, a piece may arise from a random choice 🙂

2. Set your sewing machine to widest zigzag the foot will allow, and longest stitch your machine does.

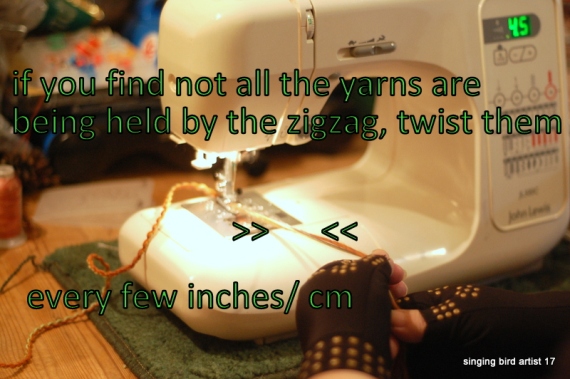
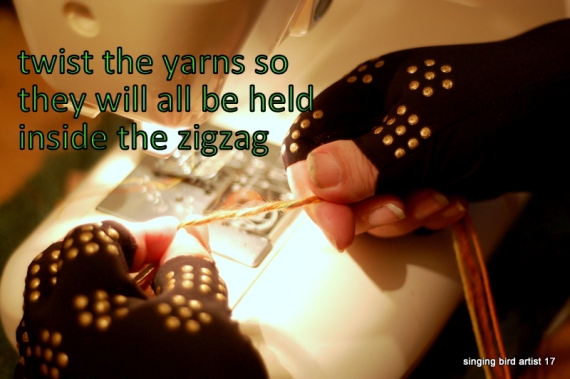
3. Hold the 4 or 5 yarns together loosely enough that there is some give, but firmly enough that you won’t drop them. Holding them too tightly is dangerous, because if you get a snarl up, you may strain the needle or worse, the machine timing.

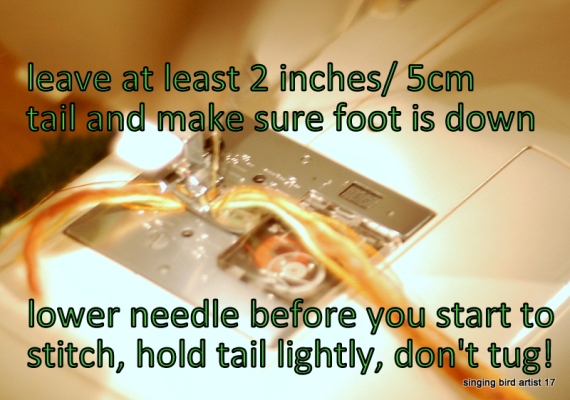
4. Hold the yarn ends with your left hand well behind the foot – do not tug! again, you might break a needle or the timing! – and your right hand between the machine and your lap, to keep the yarns smooth and tangle-free.

5. Put the foot and needle down and start the zigzag slowly. If you are used to piping this is ridiculously easy, but if you are a beginner, just take your own time until you are confident. I now have a sense of which spangle threads or eyelash yarns cause trouble and rattle along at top speed, but that’s taken a few years!

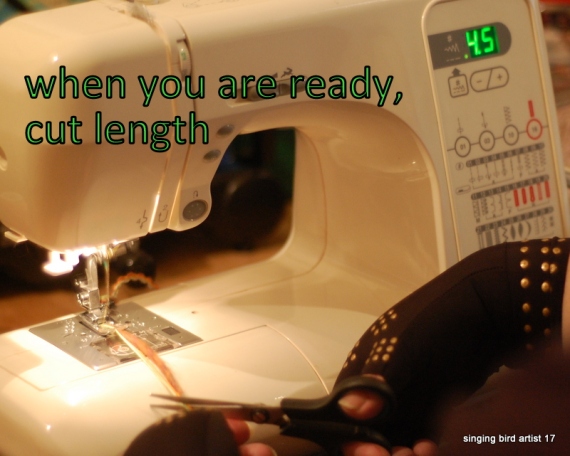
6. I normally make at least 3 metres of any cord, but it obviously depends on what you are using up, or your end goal. Cut the yarn before it goes through, and reverse it under the foot.

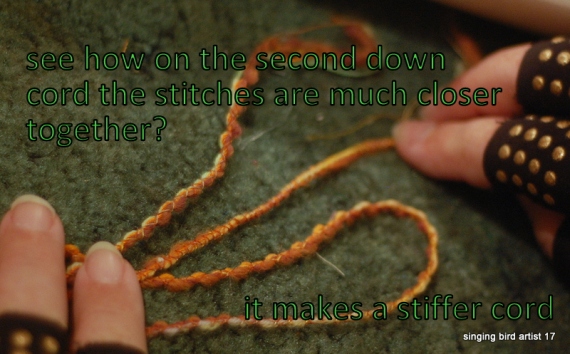
7. How stiff do you want the cord? If you want to crochet with it, or bend it at all [think bows] then reduce the stitch width by 1-2mm and the length by 2/3 maximum. If you want it super stiff, then you can either stitch at 1.5mm or several times in different colours until you have the effect you want. If you want it looser, or you’re in a hurry, then reduce by 1/3rd of the maximum stitch length.

8. Hopefully you now have a beautiful length of cord and are thinking, wow that was easy! It takes a lot more explaining than it should – as long as you hold the yarn in position and it doesn’t tangle, it is very very easy, so please don’t be put off that I’ve made 7 stages!
DSC_0021

DSC_0023

DSC_0025

DSC_0028

DSC_0034

DSC_0038

DSC_0039

DSC_0069

DSC_0007

DSC_0073

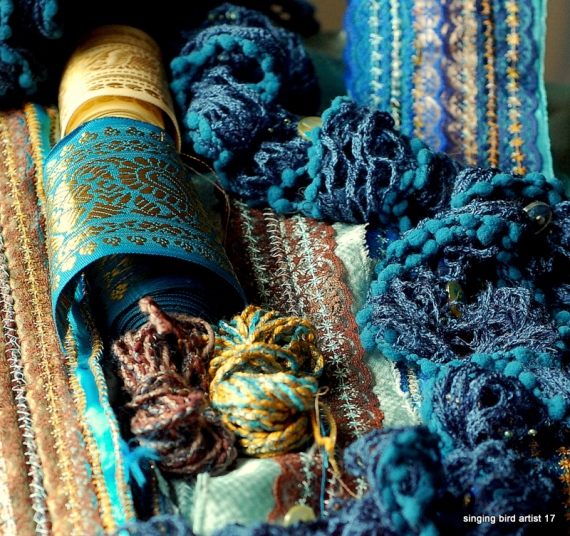
I was taught this technique on an Advanced Machine Embroidery City and Guilds and used the cords as part of my final piece, and in lots of art and craft work since. I particularly enjoy making heavily embellished fabrics, with ribbons, cords and laces stitched down with variegated threads. I’ve used it on book covers, bag handles, jewellery and gallery work. In Threads of Empire, my piece Tangled Freedoms used machine cords and sari ribbons stitched with variegated silks to represent rivers, the huge distances people travelled as part of the East India Company, the struggle for communication and the tugs on loyalty… people didn’t necessarily understand all that, but they commented on the shimmering cords and the connections they made 🙂
DSC_0049

DSC_0014

[detail 60cm x 1m of piece 60 x 360cm Tangled Freedoms 3 made for Threads of Empire exhibition, Nottingham Lakeside Arts Centre, 2017]

waste not, want not: sewing room snippets

I’ve had the loveliest evening, listening to a favourite band with interesting lyrics, while making miniature bunting/ yarn tags/ fibre art tags.

DSC_0018-001

Now, I’m using tags in the graffiti sense, a street artist leaving art that has a strong flavour /signature/ handle that others recognise. These are the first pieces of dozens, maybe hundreds I will be making for an event next month in London.

However, they are very easy and pleasing to do, and you can adapt the technique to make your own festive bunting/ tree decorations/ or even tags for gifts to crafty friends. The best thing is, they CAN be made entirely from leftovers, in fact, they are richer and more interesting if they are! Just like a patchwork quilt where you can look back and see a favourite shirt, summer dress, band Tshirt…twice the happiness!

How do I acquire all these snippets? Basically, whenever I make anything, instead of sweeping the snips and trimmings into the bin, I save them in a clear plastic bag. At a sew or knit event, I’ve been known to sweep up everyone’s snips! Some of  Truly Hooked’s yarn trimmings are in this batch, I am not a great one for pink 😉

Then, when I need a variety of materials and really don’t want to cut into a block of fabric, out come the bags. Seeing what I have available, pulling out particularly appealing pieces and mixing and matching makes the wheels start turning, and then I might seek out some larger remnants or a particular yarn…It’s a really great way to gently ease back into making if you’re unsure what to do next or feeling blocked or downhearted, the variety of colours and textures is like a salve to bruised feelings 😉

DSC_0012-001So, what have we here? Chopped off bits of felting, leftover machine cords, trimming edges on something in yellow gingham (I am sooo drawing a blank on what THAT was!!) a couple of inches of rust ribbon, a bit of rainbow chiffon with automatic stitch patterns to embellish…hmmm….

DSC_0019-001

Punchinello (the plastic foil sequins are punched out of) can be torn in half, if you start at a corner and work slowly, and then it’s much more bendy, which helps. You can see a seam edge from a charity shop blouse lovely Robyn gifted me, mmm, patterned kingfisher/ teal shiny satin! by cutting very close to the seam I got the most remnant for use, but also created an interesting ‘string’. There is a theory of proportions, called the Golden Mean, the human eye likes things to be divided by thirds, so because the white stitching makes a third of the strip, it looks very pleasing. Otherwise I could make it work by having one third and two thirds of a piece of fabric either side of an interesting line of stitching. Sometimes you can make something jump out by breaking this rule, it snags the eye, it all depends what effect you want whether it’s ‘right’ or not!

Because I have lots of interesting snippets, I can work quite fast, the trouble I have is not getting out everything in the studio 😉  oh, i have a button somewhere that would be just right, or where is that ladder yarn I was using the other day? Staaaaaaaaaaap! Challenging myself to work as much as possible from the one bag really helps 😉

DSC_0028Making a series is good, I get quicker and quicker and then I can string them together by stitching them onto a machine cord or a piece of braid or a ribbon and voila! I have bunting 🙂 Well worth a try, and good fun to do when you are going on holiday and can’t take much with you. Coming to a tree or a railing near you soon, yours or mine?

Complex cloth is good for using up leftover scraps or strips of fabric and ribbon. I used Thorntons choccie wrappers, they are plastic/foil and I need to make some waterproof embellishers too. Cut a 6″ or 20cm square of backing cloth, I used umbrella fabric someone gave me. Pin the wrappers along the fold line so you can stitch anchors in the strong sections – put the needle down first, then sew slowly, with strong thread, using a wider zigzag so the strain is spread across the fragile plastic/foil. Unpin everything, and pick a pattern stitch you like and can curve with, in a contrasting colour. Again, needle down first, start slowly and set the pattern stitch to be wider than usual. Draw lines of stitch to please you, but also anchor your scraps. This is easy for quilters, but just keep it simple and slow, and even beginners can get it right 🙂

DSC_0008

Now cut out the shape of your bunting – draw on the back if it helps – and save the scraps! This is a double winning technique!

Here are my hearts, and you can see a pile of scraps to the side – they can be used in the tags or as dolly bunting or as spacers between bigger bunting shapes 🙂

Again, very simple, very pleasing, and a great way to make something fromwhat would otherwise go in the bin, to landfill. Zero waste rocks!

DSC_0031

zero waste week 2013: bookbag tutorial

STA45619

How to make a book bag from a trouser leg:

Cut leg off above the knee (unless the trousers are from someone 6′ or more, then cut at or just below the knee 😉 )

Choose how you will make the strap – I have leftover curtain tops with tape to use up, but you could cut lengths from the upper leg, use rufflette tape or an old belt.


STA45622

Curtain tape is wide, and this is a narrow bag, so I have cut the tape in half so one curtain top will make straps for two bags.

Curtain tape is also scratchy, so I’m lining it with some leftovers from random plank quilting. First attach the lining with pins, then a running/lock stitch seam, so it will be easy to edge.


STA45623

I use a zigzag on widest stitch, half length for the first round, then close to a quarter stitch gap, and I take the chance to use up odds and ends of bobbins and reels to make

a mixture of colours 😉 by running the zigzag to/just over the edge of the fabric, it creates a buttonhole edging that prevents fraying, but also looks attractive 🙂

STA45625

STA45630


Turn the leg inside out –  according to which side you like best! – and fold the base edge down to make the reinforced base, this is probably 3″/10cm, but if it is a very wide leg, may be 5″/ 15cm. On a narrow leg the base is the knee, on a wide leg the base is the ankle – cut away any torn bits, that grunge look typically walks through the hems.

How can you tell the right amount?

When you hold the base turn in and make a straight line across the base, you have a capital I but with top and bottom straights at right angles and it meets without bunching…adjust till it feels right for you 🙂

STA45633If you need to take tucks, then do it just after a seam, it will show less and your sewing machine foot will still be high.

I go round twice, to make sure the stitching is as strong as the cloth, and if the edge looks likely to fray, then make an extra zigzag row over the raw edge.

Now put the two folded edges together and stitch with triple stitch or 3 times running stitch, again, this is for strength.

Turn the leg inside out and fold the top over if it needs it – some ankles will look fine at this point, so don’t bother with those.

Position the straps an inch away from the side seams – this saves a lot of stress on your sewing machine, and makes the bag hang better on your body, I’m always surprised

STA45634factory made bags don’t do this…

Finishing touches: sew a large button on, remembering to wrap the thread round the ‘stem’ holding the button – saves a ton of wear and should be done on every button that gets worked a lot. I sewed a loop of pretty cord on instead of making a buttonhole (confessions, my buttonholes are dogs dinners, to my shame! 😉 ) but a piece of shoe lace or string is fine.

And now you have a super simple bag that will hold books, bottles, heavy marketing without a problem 🙂

STA45636VARIATIONS:

for a messenger bag, cut one side above the knee, and the other another 4 – 6 “/12 -17cm above. Hem it and sew the button where the edge falls on the bag, and the loop on the edge of the flap.

for a sports kit bag, cut two trouser legs open and stitch as a blunt triangle, with the straps attached at neck and base of bag, to go over the shoulder.

STA45639

STA45637

zero waste week 2013: 100% upcycle a pair of casual trousers/jeans

Taking down your trousers 😉  sfw!

How to upcycle a pair of trousers depends a lot on the fabric involved – this tutorial is for jeans, heavy chinos/dockers, heavyweight cotton drill/ camouflage trousers.

So, my gardening STA45567trousers are about 7 years old and have progressed from smart casual to allotment wear and according to the paint splashes, DIY or art 😉 They could carry on this way, but the crotch will need patching soon and to me it makes more sense to make them into new things while they still look mainly ok and have a lot of wear left, than to leave them till they are half rags and have to go to end life as ground up fibres in mattresses or those wipes.

There is a way to deconstruct a garment to get the most use and least waste out of it.

It starts by recognizing your own skill set and needs – this tutorial includes some NO-SEW and FIXER-FRIENDLY projects, because it’s zero waste week, but a prom dress can be upcycled too, just veeeerry differently 😉 and would probably be best suited to someone with good sewing skills or an artist/crafter who liked tearing things.

So, the challenge is trousers to:

TOOL BELT, 2 MESSENGER BAGS, FABRIC FOR PROJECTS AND STASH, EMERGENCY ZIP AND 1 LARGE HANDFUL TO RAG RECYCLING. 100% RE-USED.

STA45571STA45573

Toolbelt;  I was taught this by a friend who volunteered at Nottingham Free Shop. All you need are good/sharp scissors.

Basically, you keep the belt and pockets of the trousers and cut away the rest.

It depends on the cut of the jeans, but even low slung hipsters can be used for this, but you might have to use leg fabric for adding (false fronting) the pockets.

I’ve discovered that trousers without pockets are beyond annoying with the rollator – I need to not be scrabbling in my bag for bus fares etc and it’s been far too hot for a jacket, so this will come in very handy next summer to wear over light trousers that won’t take pockets without tearing.

Lailah added all sorts of custom pockets and clippies to her belt to go round the festivals – you need to know where your lighter is and that it’s dry, if camping in the woods a multi-tool knife is best kept handy, and the belt loops are great for that. You could add buttoned tabs for mallets or a hammer, secateurs can go in the pockets, whatever you like really. I will machine stitch the front pocket fabric to the lining because it annoys me when I see the lining sticking out, AND it makes it far stronger – form AND function 😉 So now you have two legs and a zip and the crotch which is the bit, that with any side seams I send to the rags – but remember, NO STUDS, NO METAL, nothing that could wreck the machine that ‘grinds’ the fabric into rags!!

STA45568

What state are the legs and particularly the ankle seams in? Garments wear differently according to the user and their activities and the initial design and materials of course.So are you a cyclist who has wrecked the right inner leg by not wearing gaiters in the rain? Are you an allotmenteer or woodswalker who has encountered one too many thorn tree or bramble patch? ;)If the ankle/lower leg is in reasonable condition then make messenger bags. Cut across the leg above the knee and put the tubes to one side – a tutorial will be coming later this week for these 😉

STA45574Take the chance to notice how differently the inside wears from the outside when garments are worn outdoors a lot. In the 18th and 19th centuries, garments were turned inside out after a couple of seasons to ‘freshen’ them, particularly if they were in colours that were expensive to dye. There’s a great section in Louisa May Alcott’s ‘An Old Fashioned Girl’ where the country girl teaches her rich friend, who has fallen on hard times, to make over her clothes. I photocopied it as part of my display for the end show of the Eco-Garments course I took with the amazingly inspiring Linda Lloyd Willis.

STA45576Consider dyeing some of the fabric that is left now – cut it into the largest blocks you can and some small patches for mending/patching. I have two pairs of these trousers, the other pair is burgundy and if I dyed some blocks of each brown or black, I could now make a project with the same fabric in 3 colours – patchwork bags, cushion covers, floor cushions, dog beds (pets love having your old clothes to snuggle in, they can still smell you 😉 )

I’ve been making cloth carriers to sell at Nottingham Fixers stall and this fabric would be fine for that, large simple blocks for the body and you could use contrasting thread and an automatic stitch pattern on your sewing machine to make a feature edge and pocket.

Inevitably there will be some long narrow pieces, but these have a use too – cut strips nearly an inch/2.5cm wide and roll the strips up, you now have fabric ‘yarn’ for making cloth rugs, another tutorial I am going to share this week 😉

So, I think we made it – 100% used/reused, ZERO WASTED 😉

feels good yes? 😉

STA45578STA45580STA45583

zero waste week 2013: darn it!

STA44157A re post in honour of zero waste week:

This sock should not have needed darning, because it should never have been knitted! I was entranced with the yarn and thought I might get away with it as this had a variety of fibres in the variegation…but no, it became an ankle warmer the other day 😦

Lesson learned: sock yarn!

always ALWAYS always use sock yarn when knitting socks…and darning the holes in previous aberrations, sigh..

STA44142

and buying socks is fraught with disappointment! 2 washes and these alpaca slipper socks had potatoes on the heels, gggrrr…but I have a LOT of pretty sock yarn so I thought I’d make a feature of the darns…Eleanor of Knit Nottingham fame was outraged at this waste of regia, whereas I felt it made the job more fun, and the darns show as i wear these socks with crocs (omg!!! the fashion police reach for their charge books, while  the disabled nod and say, aah, the anti-slip technique…)

Anyway, this gives me the prod to do a mini tutorial: darning socks

STA44145

tools: darning mushroom or smallish tin or tennis ball if you are darning bigfoot’s toe cosies

darning needle: large blunt needle with big eye/tapestry needle/bodkin

yarn of choice: super smooth darning demands 1 or 2ply yarn, but if you are in a hurry 4ply is fine, match or contrast according to taste and remnants 😉

-place the mushroom behind the hole

-weave first thread in and out of yarn 2 rows in from the hole

-keep going backwards and forwards, and as you cross the hole, if there are any original threads left, try and weave through them

-continue to two rows after the hole

-now turn sock round by a quarter so you are stitching at right angles to your rows

-weave in and out the lines of yarn, as close as you can to the previous row, till you reach the other side

-remove mushroom and stretch the darn with your fingers from the inside: can you see a lot of gaps? these will HURT when you walk!

-put the mushroom back and weave extra rows through to make the weave more solid and tighter, I often strike through at an angle or make a spiral at this point as I was taught this strengthens the darn

– does it feel and look solid but not clumpy? job done!!

Because a favourite pair of socks is worth repairing, whether hand knitted or not.

It is a very enjoyable task when you are only doing 2 or 3, though in the old days, darning for a big family might have been a bit dull… but even then, I think a lot of people found it satisfying. I remember reading one of the Antarctic exploration teams had competitions for the best darns 😉 and of course it is the root of most embroidery stitches in countless traditions round the globe.

waste not, want not 3: Tshirts to bags 1

Amazing the difference it makes when I have almost no pain from my elbow! Suddenly I feel lively and interested in things, and life is sending lots of interesting artists to research – excellent timing 😉  So, as promised, another installment of upcycling goodness, inspired by turning out my drawers! I have a brand new washing machine (first time ever!!) and while it was very useful to discover I still had Tshirts on their last legs when I had to manage after the last washer broke, now, now I would rather have some space to see what I look halfway respectable in (ok, clean and tidy 😉 artists are rarely respectable!!)

STA45222  Nonie gracing a pile of tired and pilled and washed out trousers and shirts…all will be upcycled in ways I will share with you 🙂

Bottom Tshirt is a long sleeve crew neck from Cotton Traders that has served its time…but I feel really guilty not wringing the last drops of use out of cotton, because it is such a horrible crop to pick and process. And with a little energy and ingenuity I can make new things:

CROCHET HANDLE TOTE

1) Cut a snip next to the first respectable bit of the under arm, then tear across to the other side. Check for holes, stains etc., I have a gift for catching on barbed wire at the allotment/in the woods, just by the hip, so I cut that out. Turn it upside down and inside out – the colour will be fresher on the inside and the bottom seam (hem) is almost definitely sound.

2) Find some bright remnants, this is a leftover from Diversity, but a tired scarf or flowery top might come in handy here. Stitch the feature piece where it is most effective, using a zigzag or staggered zigzag if you have one.

STA45224

3) Use a strong stitch for the edge seam – I used triple stitch, but you could just go over straight stitch twice, but do use good thread 😉  Start the seam at the hem edge as this will be the most noticeable join on the finished bag! Trim any raggedness, but leave at least 5mm for turning, and now zigzag the edge down. This is a lazy French seam, and it protects the edge and looks neater 🙂

STA45226

4) See how much neater it looks? But it’s increased the weight-bearing strength of the bag too, as have the rows of stitching holding the decoration, cool, huh?!

5) Take a length of fabric, either the Tshirt sleeves or the decoration if you have enough, that is 2metres long by approx 10cm, that’s a sleeve cut in half on the length, twice, about a finger wide.

STA45227

6) Fold it double and zigzag the edge so you have a tube, it’s fine to stitch right side out, but try to stay close to the edge but not over!

7) Now make a loop with one end of the tube and pull another loop through, using the long end of the fabric…and again, and again, until you have a crochet chain. It should be long enough for a handle, but just check! Now fold the ends in and stitch the handles down firmly, using a satin/heavy repeat pattern stitch ( I use lazy daisy) or, go backwards and forwards 3 times on straight stitch. Using the bottom hem of the Tshirt as the top edge of the bag just about guarantees a good straight edge, and stitching the handles to the double/ treble thickness means they shouldn’t tear when you fill the bag with shopping – it will stretch, so you can get a lot in!

8) Repeat for the second handle, trim any ends and admire your new tote! 😉

STA45229

9) Keep the rest of the Tshirt, I will be showing how to make a swimming/gym kit/shoe bag out of the next section 😉 or make another tote to give to the first person to admire your work!

STA45228STA45229-001

waste not, want not: raised beds for veg

STA45158STA45174

The number of self seeded and unwanted sycamores in the communal garden is almost beyond counting: Ben took down 35 in one weekend and hardly made a dent on anything except the woodpile 😉

Not totally true, of course, some areas still need a lot of clearing, but the slabbed area the guys use for bbqs suddenly had lots more light, enough to make it a vegetable growing area.

There are many ways of  making raised beds, but first think about your materials to hand and your long term goals. On the allotment I would make temporary raised beds as a way of mulching the next area I wanted to bring into cultivation:  knocking back weeds and enrichening the soil and making a reservoir of compost AND growing a main and companion crop all at the same time is incredibly pleasing! 😉

4 STAR land clearing beds

1 old tyres

1 lay waste cardboard boxes to cover the area you want to mulch

2 space out large tyres to anchor edges and joins

3 stack a second tyre on each pile, line with landscape fabric, fill the middle with manure, woody prunings, hedge clippings, top with balled newspapers

4 stack a third tyre and add comfrey and nettles or green waste/weedings, top off with soil and plant squash/potatoes / tomatoes or aubergine with borage, marigolds or nasturtiums, with an empty flowerpot angled towards the roots, a stick holding it in place, with a bright rag at the top.

5 water and crop as necessary but at end harvest have your next patch ready mulched with cardboard so you can just roll the tyres to their new position 😉

2 builders bags:

1 lay waste cardboard boxes to cover 5′ x 5’/1.5 x 1.5m

2 if possible lay bricks around the edge

3 builders often abandon the white recycled plastic 1m cubed  bags that sand etc is delivered in, as some depots will not refill them. ask nicely or keep an eye out for nearby skips, ask people on your street who are having a new drive etc for the bags, people are mostly happy to get rid of them, though i have paid 50p sometimes. If the bag is for sand and gravel it will have a long funnel in the base, make sure you fold this over so there are no gaps for weeds to come through. Fold the sides down on the outside, so that as you fill the bag, you can pull the sides taller.

4 fill the bags with: raw horse manure or rabbit hutch clearings to a height of 8″/20cm or 4″ 10cm poultry manure, then add 6″/15cm woody prunings, hedge trimmings and shredded paper or balled newspapers and cardboard, next add rotted horse manure or grass clippings or non invasive weeds/spent foliage*, top off with soil and shake the bag and raise the sides. Now add more newspaper/torn cardboard/1 year leaf mould/old compost and if you have them, a layer of comfrey and nettles and 2pints/a litre of human urine. Cover with grass clippings and leave for a week.

5 shake down again and I used to use a claw or hand fork to aerate by raking through, a bit like tossing a salad 😉 Now put good soil or compost on top, plant in a squash plant with an empty flower pot angled towards the roots, sticking an old cane or long pruning wand in, to anchor the pot, with a bright rag on the end. When the squash has enormous foliage you will still be able to find the roots and get water where it is most needed 😉 plant marigolds or nasturtiums around the edge to bring in pollination insects and make pretty colours and composting bulk for next season 😉

6 water weekly as needed but otherwise leave till autumn cropping

7 when the first frost is forecast, harvest your pumpkins/gourds and leave to cure in the greenhouse/full sun for a couple of days, bringing in at night. Meanwhile, fork all the fresh foliage into a barrow and put on your overwintering compost heaps or the next builders bags* see instruction 4 😉 Use the remaining mature compost to fill a raised bed or to mulch your overwintering brassica patch/beds

STA45178

I used to have half a dozen or more of these each year and it kept the allotment committee happy as weeds were being contained and the plot was productive, while I didn’t have to dig bulldozed soil (my allotment had been totally trashed by the previous guys, who were scrapmen fixing cars…they even laid gravel at one end! After 4 years I  had lots of permanent raised beds that meant I could lay proper paths with builders fabric and chippings/hedge trimmings. Try to become friends with everyone in your street who has a hedge or big lawns, they will often bring you their bags of trimmings right to your allotment as it saves paying for a garden waste bin or a long trip to the tip. I used to give the cleanest white bags with no funnel to the neighbours to collect their clippings to bring to me and they progressed down the chain to raised bed base and side linings s they deteriorated.

PERMANENT RAISED BEDS USING UPCYCLED MATERIALS

STA45147

1 dig post holes at the corners and joins, put in posts and join sides  OR

line a trench vertically with small logs and add narrower pieces horizontally, usin nails or screws

2 line with builders weed cover fabric

3 fill with layers of fresh horse manure etc as above

STA45170

materials:

wooden doors, sawn in half

logs from clearing trees

treble layers of building site mesh (often abandoned in skips at the end of the job) with old tent poles every 6 inches

fence panels, doubled up for strength

old bricks/slabs

pallets

railway sleepers

if you drink lots but don’t make wine/beer, save the wine bottles, turn upside down and bury to half height or lay on sides and cement – I’ve not done this myself as I would be worried about the glass cracking, but others have, google for advice 😉

tyres on their sides and buried to half their height

old pet cages/hutches with cardboard box lining

and lots more, the trick is in how you look at what has ended its FIRST use…

Happy scavenging 😉

Updates on the potatoes: rocketing away! and an aubergine seems to be growing from seed in the compost?

STA45154

hot fabrics 1 the organza sandwich

So I have new toys 😉

text 1a HEAT GUN and a SOLDERING IRON, both from Lidl’s occasional bargain section, tbh I would not have bought these right now, but £17 for both, when a heat gun is £25-£45 on its own, was more than I could pass up …

I enjoyed torturing fabric on the embroidery course, and while I lived with an open fire could still use a hot poker, but I have missed it since.

So, how to get back in the swing of it/ get familiar with the new shiny toys 😉

I made an organza sandwich, using an 8″ x 18″/ 20 x 45cm length of organza in a colour I bought cheap  and am not fond of it (I’m aiming to burn most of it off, remember). This is a good chance to use scraps of silks and rayon, nylon, tulle, satin, chiffon, mixed with sturdier fabrics, moving up from lingerie lace to cotton. Only use polycotton if you are brave, it can do VERY strange things under heat, and STINKS to high heaven.

text2

text 3

I like to use quite vivid scraps, and arrange them in a jumble, though because this is a test piece I grouped my cottons at one end. Pin a few anchor pieces to the halfway point and then fold the organza down. The fabrics need to join/overlap because the organza will, in effect, DISSOLVE, and what will hold the piece together are the threads and the remaining fabric.

Use leftover ends of thread, clear bobbins etc, but try and keep the front multi coloured and the back black or plain. I use different stitch patterns or colours as I stitch across linked fabrics, eg feather stitch across all the tulle, pinking across the silks, so I can guide the scorching for the effect I want.

All this bit is much quicker than it takes to explain, but experimenting will be more effective if you take photos or make notes. I colour coded on the course which helped keep me on track 😉

text4

using up

At this point I stopped (fibro fatigue) but making a few at once is a good idea, even duplicates if you are testing effects for a specific piece.

Now to the hot stuff!

WARNING: HEAT IS HOT!

HEAT GUNS ARE MUCH, MUCH HOTTER THAN HAIRDRYERS AND BURNS HURT!!

SET UP YOUR WORK SPACE: open 2 windows/a door to the outside to have a through draught, have a bowl of cold water in the sink in case of burns. Have a metal surface to work on and use a foil baking tray to rest the organza sandwich on, and barbecue tongs are very handy! (£/$ shop is your friend!)

warning

NEVER lay a hot heat gun on fabric, it will scorch and burn in seconds and could burn the house down when everything fuses. ALWAYS work at least 3inches/10cm above the surface, coming in closer as you need to. Know where you will lay the heat gun if you get tired/ burn yourself/ the phone rings/ the dog barks… I use an upside down metal biscuit tin, not ideal, but ok if I can turn off the heat gun as I lay it down, as the ridge keeps it in place.

So, having scared you all into health and safety, prepare for fun! The artificial fabrics scorch and melt really fast, so start high up and move in slowly, ready to draw back..watching  the organza shrivel and the colourful scraps emerging is very pleasing.

Tulle and foiled fabrics go quickly too, cottons and thread are slowest, this is where threadsyour stitch patterns/colour lines come in, there will be a heat shimmer and the organza dulls down the fabrics, so follow a line to bring out the interesting scraps, and make holes in the dull parts 😉

org,notcotCotton won’t burn into holes, unless you have a top range heat gun. But you can use an incense stick, a match, a skewer heated in a gas flame or a soldering iron to make small to large scorch holes (see further down!) So, turn everything off and lay it down safely and evaluate.

dogsdinnerAfter all this, your sample may look like a dog’s dinner. Do not despair if the effect is not what you wanted! Mine looks pretty dullllll…

or does it?

Bring it to the light!

window

Silhouettes give you a much better idea of where the work is really at…if you are a process artist, this is where the ideas really start flowing, because the silhouette can be so striking…

wiindow 2

The soldering iron can be used to make bigger holes in cotton, but I bought it more for other things, because I don’t like the mess it makes of the end, it cleans up easily, but because I have the tools for hot knifing, it’s much easier to use those, kind of like washing a food processor or a grater, the grater is slower, but if you count the washing up, tons easier 😉

More work to be done on the sandwich, my sewing machine is not happy at the moment, so part 2 may take a while…

soldering1

solderholesmuckySTA45078

bubblewrap pressprinting tutorial

Tutorial is a tad grand for this technique, it’s so simple! There are always a couple of  things it’s worth knowing in advance though 😉

1) choice of paper/surface plays a large part in the effect, so if you have time, prepare a few small samples of  different surfaces, write in OHP pen or laundry marker in one corner what it is and print away. Then mount all your paper samples together on one spread of your sketchbook/studio notes per paint variation and you have a handy reference for years later when it has all faded in your memory!

What effect pleases you most?

OLYMPUS DIGITAL CAMERA

If you like wrinkled and crozley, choose a cheap, poor quality packing paper – brown parcel paper or plain newspaper or the packing paper inside parcels.

If you like a clear pattern with a smooth surface to go under your sewing machine, a good quality manila is the way to go, and those who respect their machines will not use glitter paint (do as I say, not as I do 😉 ) and hoover the bobbin chamber, the slot above the needle and under the plate to remove dust from the workings! (Yes, I do that 😉 )

If you want to print on surfaces other than paper or card, make test samples with your colours and think hard about use… wrapping paper that is foiled is nice to work on, but be aware it may craze or crackle, so allow room for that in your overall design. For clothing, printing with a fabric ink is the most reliable, because lots of paint washes off, though the acrylic in the 100ml bottles you get at fabric shops should be laundry safe, and at the other end, most artist quality acrylics will not wash out. They will however feel very harsh, and if you have any environmental sensitivities, allergies or fatigue issues or are making for a child, please avoid them as there are a lot of artists now having  serious health problems that seem to be linked to them – acrylics are plastics and plastics can have invisible outgassing…

2) choice of ink/ paint the easiest to use is the children’s play paint from Early Learning Centre, Hobbycraft or more cheaply at Wilco etc.,

I have also mixed brusho into pva/ white craft glue to paint onto fabric  that isn’t going to be washed and sometimes got away with it, glitter paint and the lustre paints that are around a lot at xmas are all very easy to use and work well on paper. Food dye may fade/ change colour quite dramatically, the “red” I have been using is a lovely burnt orange as you paint it on, fades to orange, but if left a bit too close to the fire when drying, fades to candy pink…?!?

So, what do you do?

1) paint the bubbly side of the bubble wrap with runny paint/ dye mixture

STA44624-001STA44625

2) lay onto surface, press gently, no white knuckles needed 😉

STA44627STA44631STA44633STA44635

3) lift as smoothly as you can and print a second sheet

4) lift the wrap and put to one side, move the wet print to a sunny windowsill or by a radiator and leave to dry

STA44636STA43865-001STA43867STA44552

and repeat… because the paint is thinnish, if you get it dried quickly, you can overprint with a second colour, but you can paint in stripes, you can leave gaps on the wrap or print headers and footers, you can use this as the faintest background to give you prompts to overstamp, you can embellish with gel pens or stitch or text or….??

It’s a lovely first layer to release ideas if you’re finding your way back into being more playful as you make art, and it’s as easy to use with children as sponge printing, and at the end they can pop the bubbles 😉 have fun, chickabids!!!

STA44033

STA44410

bookbinding — badly ;)

If a thing’s worth doing, it’s worth doing well. But if you can’t do it well, do it badly.

Just DAO it  😉

I made a lot of badges with that on for my first solo exhibition in 2001 and they were quite popular, as NIKE’s ‘just do it’ was big at the time…

I tried a different way of binding the sections (signatures) of the maps book, and it was a lot easier, quicker and hopefully my hands won’t be in such pain as they were with the first book, where I stitched the front edge of the spine of the first section to the front cover, and the back edge of the fifth section to the back cover.

This time I doubled the cords that I run through the signatures back on themselves and then sewed them down to the cover. Much easier to manipulate, and perhaps a quarter of the time involved….it seems to work pretty well, too, the cover of this book is thinner, though quite densely quilted, but seems to be only slightly softer/floppier.

STA44168-001STA44170-001

STA44171STA44178-001

buttons-a-go-go for the spine again:

STA44162-001STA44176

Photography is one of those things that has to be done well though 😉 I tried out my new tripod today, but need to get the hang of it more before making the slideshow…I started, but need to make some adjustments, more distance, more natural light so the flash won’t insist on going off and thus over exposing the image and figure out a better angle to take the shots at, I think this book is an inch/2.5cm deeper than the first one, because it has two chunky felted spreads in it.

But I am pleased with some of the metallic marker embellishing I did at the weekend,  so here are some teasers till I get the slideshow sorted, with a photo for Nonie-puss’ followers 😉 :

STA44196STA44180STA44189

STA44164